Wednesday, January 15, 2014

Aggie Overalls & Bow

     Where I live, homecoming doesn't only mean a dance- it means over elaborate mums and decorated overalls. It means mums so obnoxious, some teachers make you take them off in their classroom. It means cowbells, flashing lights, and glitter. So distracting, you wonder why girls don't just wear neon signs.


     Unfortunately, overalls and mums/garters are the only thing I enjoy about homecoming. Besides the football game, anyway (GO KATY TIGERS!!!).  I make a lot of overalls here in town for our schools, and someone had asked me to make Aggie overalls for a little girl that should be born anytime. So, I took on the challenge, thought like a Tiger/Aggie, and I created this darling set of overalls and a matching bow. Can someone say ruffle butt!? Can someone say "WHOOP!"

Monday, December 9, 2013

No-Sew Stocking (Tutorial)

     Hey there! I hope everyone had an awesome Thanksgiving! I know we did. But man, there were a LOT of people in a not so large house! But now that Thanksgiving has passed, it's Christmas time... and you can't have Christmas without stockings!

     I decided to make our own stockings this year. So many people use old onesies and outfits to make a quilt, but my kids have so many quilts already, why add on? So, I made old-clothes-stockings!
Eden's
Jax's

I'm not a huge fan of Jax's, but it'll do for now. And I put their hospital blankets as the back. I thought it was a cute idea. 

Then I decided to make mine:
I'm very happy with it. So then I made Brice's:

He's a huge Boston fan. If you can't tell.

So how did I make these suckers? Well first, pick your fabric or your favorite clothes of your little ones' and get to piecing. I used an old stocking as a template so I knew how many pieces of clothing to put on the kids'. If you choose fabric, trace a stocking or make the shape of a stocking on the fabric. Make sure you make one for the front, and one for the back.
**Helful Tip: make sure you give yourself some room on all sides of the fabric, as you'll be folding the fabric in so nothing frays.**

Once you have everything laid out how you want it, start folding the pieces under to make your "seam".

Do this allllllll the way around on ONE stocking cut out. Then, place the other stocking cut out under the cut out that you have "hemmed" and fold the extra fabric to the inside of the stocking and glue. (Check out my "No-Sew Pillow" Turorial if you are having a hard time understanding what I mean). I chose not to fold both sides and then glue together because the chances of them being an exact match was pretty slim.

Once you've done your "hem" all the way around except the top, now it's time for the hanger.

Get a piece of left over fabric (or any fabric) and cut it straight. I did mine about 6-8 inches long. Fold it in half.

After you have folded in half, glue the tips together:
**Helpful Tip: use a pretty good amount of fabric/hot glue- whatever you're using. I used about the size of a dime.

Then, glue one side of the hanger piece to the inside of the stocking OPPOSITE of the toe. Make sure you let enough pole out. Once you've glued one side, glue the other:

TADA! You've made your stocking!!! Congrats!!! Now you can decorate (if you want to) and get this Christmas rollin'!!! Merry Christmas, y'all!!!

Saturday, November 9, 2013

DIY Draino


Every kitchen or bathroom sink gets clogged some time in its life. Well, this time it was ours. Not only did I not feel like going to the store, but I also didn't have $7+ dollars to spend on Draino. So I decided to make my own! All you need is vinegar and baking soda and you're all set.

It's simple, really. Pour 1/2 cup of baking soda into your sink. Then, follow it with 1 cup of vinegar and cap off the awesomeee chemical reaction with your sink plug do-hickey and hear your drain unclog! I chased it with a lot of boiling hot water after about 5 or 10 minutes. If you choose to do this, make sure you dump the whole pot in the sink relatively fast so the water is forced to push anything left over.

(**Tip: if it didn't work the first time, wait a little while and try again.**)

I don't know about you, but this process was SO much fun to me! I felt like I needed safety goggles and a lab coat! Happy Plumming, everyone. :)

Friday, November 8, 2013

No-Sew Pillow Cover (Tutorial)

If you couldn't tell from the previous post, I would prefer to stay as far away from the sewing machine as possible.

When I decided to recover all if those crazy pillows, I knew I wanted Chevron and knotted pillows. Well, I got my knotted, now for the Chevron.


Just like the knotted pillows, all you need is your fabric and some handy dandy hot glue.

First, measure the fabric to double it's height, plus a few inches. With the width, just add a few inches. Place your pillow on the fabric like this:

Once you have it in place, start folding in the sides an inch or so and use hot glue to tack.
I started with the top/bottom of the pillow, then did a side, then the opposite of the top/bottom then the side again.

I put my pillow in and start gluing the folded sides together.

I started gluing the sides first because I had minimal fabric for this pillow by its width and more on its height. But, you can glue however you want.

Now, the way I did it doesn't give a "bottom seam". If you want a "bottom seam", l you have to do is give yourself a few more inches on the height and glue about a half inch to an inch and hot glue the fabric together.

And there you have it! A no-sew pillow cover! And with the extra fabric I had left over from the knot pillows and the chevron pillows, I spruced up my storage cubical!

No-Sew Knot Pillow Cover (Tutorial)


When my husband and I got together, he had these hideous, man cave worthy, Elvis blue couches. When I say man cave worthy, I mean the huge reclining set that you literally get lost in and have to scoot off of. He loved them, but I just couldn't do it. Then we went couch shopping. Now, our living room is pretty small. But, Brice didn't think it was as small as it is apparently, because then we picked up this monstrosity:
Rips included. I obviously didn't win that battle at the store. So after nearly a year and as rips were FINALLY starting to annoy the hubs, I decided to get couches that were not only rip free, but practical in size. My friend decided she wanted to sell her smaller scale couch an love seat set. She told me she would give it to is for $100 and I jumped right on it!

Now, for those of you who don't know me, I am NOT an animal print can and I don't particularly care for red pillows either. So, after unloading the couches at 8pm Wednesday, I went to Hobby Lobby Thursday morning to get fabric to recover the pillows. Now, the couch looks MUCH better (in my opinion) and I'm quite pleased.

Eventually (like, during nap time) there will be cute little sayings on the burlap pillows. But in the meantime, how did I make the knot pillows? Even without a single needle and thread?

Here's how:

Once you pick out what fabric you want to use, get double the size of your pillow. Once you cut the fabric to size and you're ready to begin, place the pillow in the middle of the fabric:


Once it's centered, bring the top of your fabric and the bottom together. If they overlap, that's fine. As long as your pillow is covered.
Once you have folded them to meet/overlap, put a little hot glue in tree to secure the fabric to the pillow. I just put not glue on the edges of the fabric.

After the fabric is secured to the pillow, fold the ends of the fabric as if you're making a paper airplane:
(**Tip: hot glue the touching corners to keep the fabric in place and make it easer to knot.**)


Then fold the edges to meet in the middle:
(**Tip: hot glue just like in the last tip to insure easy knotting.**)

Once this has been done to both sides, it's knot tyin' time!

Make your first tie:
 Then the knot!
Hot glue the tips left over behind the fabric and maybe add a little glue in the knot to make sure it stays........

And tadaa! You've got your very own knot pillow. Congrats! See, it wasn't so hard.

Monday, November 4, 2013

Eden's Granny Chic Nursery


 When Brice and I found out Eden was going to be a girl, I was terrified and excited. Terrified because the mother-daughter relationship is so much more different than a mother-son. Excited, because I could decorate a GIRLS room and do it exactly how I wanted!

     Immediately I knew I wanted it to be a vintage inspired room- what I call Granny Chic. I also knew I wanted a tree on the wall, the letter E, frilly accessories, owls, lace, burlap, and floral Granny fabric. I wanted something that even Gimmie could wish for! So, I started with the paint. I chose an aqua because let's face it, I am NOT a girly girl. I started selling Stella & Dot to get me out of my comfort zone and MAKE myself be more feminine. Pink is NOT a color I like. Purple was too feminine, but a subtle aqua was not only gender neutral, but very... beautiful. My favorite color.

    After the paint, I wanted the tree. But not your ordinary stick-on tree. I wanted demension. So, I bought the tree, Velcro, and flowers from the craft section in Walmart...
...and there we go. My tree with demension.
Eden's tree, rather.

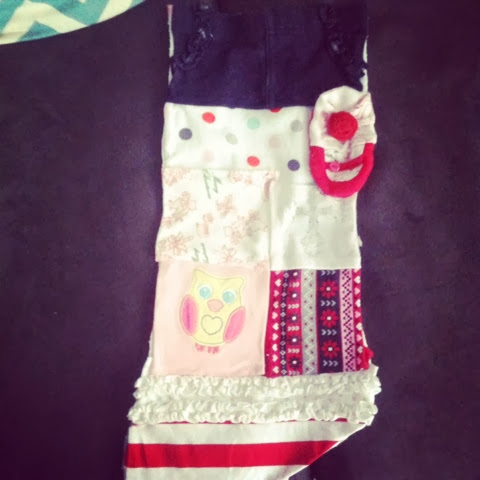
     I knew I wanted floral Granny fabric to go with this vintage theme. But I didn't want to just throw fabric in a frame and hang it in the wall. I wanted something that was unique. Very cute. Very "whoa, that's a GREAT idea!"

And in came the embroidery rings. I got these from Hobby Lobby for stupid cheap. I got a half of a yard's worth of fabric in each print, put it over the inside circle of the embroidery ring, and put the outside circle with the tightening screw over the top (***Make sure the circle is capturing a cute part of the print so it doesn't look silly***). After you get the section you want, cut the excess fabric off, and you're finished.

     Every nursery has to have the child's name SOMEWHERE in there... so just take the extra fabric, some letters from Hobby Lobby, grab your handy dandy hot glue gun and get to gluing.
The flower accent is just a head band for babes that was put in the side of the letter. Easy peasy!

There is still some hanging to do, but this is where we are so far:


Later, I will post the finished product. Her room was cheaper than doing my living room. Heck, it was even cheaper than the accessories in my bathroom. The dresser was a hand-me-down, the crib I got off of Craigslist for $40, the paint was about $25 (paint and primer), the rocker I got from the neighbor for $15, and the wall decor I did for less than $50. That's the rings, tree, flowers, fabric, a few pictures, word art, and the dresser accessories! I don't care who you are, that's a good deal!

Why, Hello There Darling.

     Welcome! My name is Mazie (May-zee)! I am a wife to one good lookin' man named Brice and a momma to our four beautiful children- 2 two-legged named Jax & Eden and 2 four-legged named Kimba & Achilles. We live off of 1 income here in the Miller Household- my husband's. I sell a line of jewelry and other girly things called Stella & Dot. I am a firm believer in God, love, peace, and that there is always a cheaper way to do things. 


Brice & I

Jax & Eden

Kimba & Achilles

     Our family lives in a town right outside of Houston- a far cry from where I came from. I, along with pretty much all the women on my mom's side of the family, are from Fort Stockton, TX. A very dry, ugly desert in way west Texas. My grandparents still live there. Bless their hearts. Gimmie (my grandmother in Fort Stockton), is the queen of home remedies. She is a country gal, along with my Pappy who does handy work for all the churches and pretty much the rest of Fort Stockton. I would have to say I get my "I bet I could make that for cheaper"-ness from Gimmie. Her and my amazing mother-in-law, Marsha. I get my eye for design from my mom, for sure. But of course, I put my own twist on things :)!

Gimmie & Pappy (Fort Stockton's Mr. & Mrs. Clause)

Brice & my MIL, Marsha

Jax & my mom


     I started this blog because I do a ton of DIY work. Times are so tough now, and people try so hard to make it seem like they aren't struggling. We all are (thank you Obama), and I don't thinks its fair that we all have to suffer. Just because we don't have money like BeyoncĂ© doesn't mean we can't furnish and decorate our houses, accessorize, or give nice things like she can. Take THAT!